As with many techniques, careful preparation is the key here.
Choosing the zip
You must decide whether the zipper should be visible or concealed. You can purchase special ‘concealed’ zips which are intended for dresses etc., though tend to be of a fairly narrow gauge. You can easily achieve a concealed zipper look using a normal zipper.
Nylon zips are preferable to metal ones, especially as many brass/bronze metals cause discolouration. Nylon zips also tend to have a smoother mechanism and are available in variety of weights.
Most zips of the lengths that are useful tend to be open ended – that is that the two sides come completely apart as would be essential for a coat. The good news is that open ended zips can be converted to closed-ended zips much more easily than the other way around, and as it is common to need to shorten the zip to the desired length then this conversion is no additional effort.
Preparing the zip
The first step in preparing the zip is to modify the material of the zip so that it will stick to latex.
You can either use Copydex or the same latex adhesive that you use normally. However I favour using Copydex as it is much quicker to apply in the quantity required to saturate the material of the zip.
Both adhesives are essentially a solvent carrier for latex molecules. In either case the goal is to thoroughly embed the latex from the adhesive into the material of the zip. The zip will then adhere to the rest of the garment using the normal latex construction techniques as if the zip were made of latex.
Copydex
If using copydex this should be applied generously so that it is completely soaked into the fabric of the zip. You can then roller this flat.
Copydex starts to dry pretty quickly. Once it has started setting it is very easy to get little balls of copydex on the surface that are hard to remove and will affect the look of the zip. This can quickly become irreversible at which point your only option is to start again with a new zip.
It is best to avoid getting Copydex too close to the teeth of the zip. Try to leave a millimetre or two between the edge of the teeth and the area being glued. Given the need to work quickly with the glue I find it useful to mask the teeth using insulation tape which I then pull off BEFORE allowing the glue to dry. Any glue that does get on the teeth, or to close to them will cause some friction when the zip is first used until it balls up and can then be picked off with tweezers.

Apply the copydex swiftly, roller the excess off and then hang the zip to dry thoroughly (e.g. a couple of hours) taking care not to touch it once it as started going tacky. Once dry the copydex will completely lose its white colour and the fabric of your zip will now be rubbery.

Do not scrape off the excess copydex using a glue spreader as this seems to cause it to ball up faster.
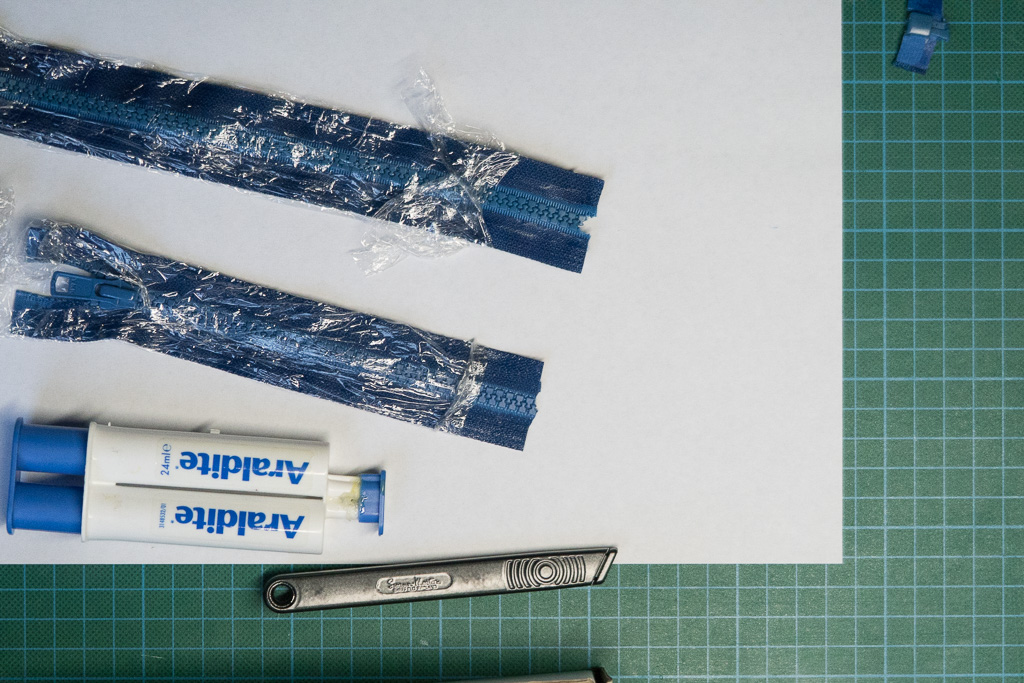
Once dry the zip should look like this:

Prepare the zip with the Copydex before trimming it to length. This will allow you to handle and hang the zip to dry using the parts that you will then be cutting off. Once dried, if not using the zip immediately then protect the prepared surfaces with cling film to protect them from picking up dust / stray particles.
Cut the zip to length using a scalpel whilst the zip is in the fully closed position. The zip will need to be at least 6-12mm longer than the opening.
Use Araldite to bond the bottom of the zip. Leave this to dry completely before proceeding.


Preparing the garment
It is easier to apply a zip to a completely flat piece of latex. Therefore I find it best to put the zip into the pattern piece before the piece is glued to the rest of the garment.
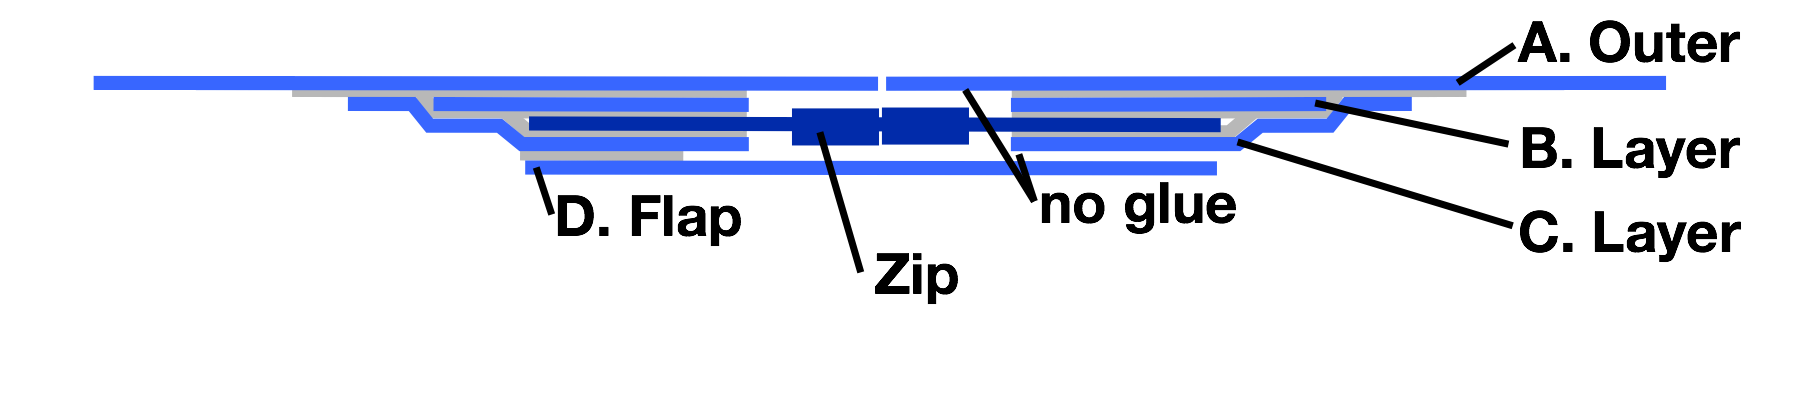
Zips have no stretch, this is essential to the way that they work. Anywhere that stretchy latex is joined to a material with no stretch then points of stress are introduced, in this case, at the immediate edge of the zip along its entire length, and depending upon the garment, particularly at the very top and bottom. In order to de-focus this stress the latex should be layered incrementally around the zip which causes it to become far less stretchy and allows the stress to be spread.
Schematic of layers (showing zip in dark blue, and glued areas in gray):
The following three images show the addition of an extra layer (B) to the main panel. The additional strip is 5mm wider than the area of the zip that it will overlap.
Mark out the area to be cleaned and glued on the inside of the garment piece. Mark the length of the zip and of the opening (noting that these will be different).
Clean the surface, apply glue and then cover with cling film. Ensure the marks for the cutting of the opening are restored correctly.
Apply the zip, taking care not to stretch the latex. Consider using masking tape on the latex to prevent it from stretching.
Once zip is correctly positioned use the roller firmly to make a good connection.
Add another layer (C) of latex on top of the zip. This should be wider than the previous additional layer that was added at the start. In the images below I am using a contrast colour but it would be more conventional to use the same colour.
Finally a flap (D) may be added along the zip. Ensure that this is not adhered to the previous layer to close to the zip.
Result:
Concealed zip (using normal zip)
To conceal a normal zip the only change required to the above is to have a slit, rather than a slot in the outer layer.
Check the markings for the cut that will be the zipper opening. Cut the opening using the rotary cutter and cutting ruler.
Use masking tape on the shiny side of the garment to hold the newly cut edges back into *perfect* alignment.
The layering provides a secondary function for concealed zips in that it provides a separation between the outer layer and the zip mechanism.
With all glued surface still protected by cling film lay the zip into the correct place.
Create a masking tape hinge so that the zip will tend to lie in exactly the right place.
Check the alignment looks perfect. The central line of the zip must should perfectly with the opening line.
Remove cling film from the garment piece.
Starting from the closed end, remove cling film from the zipper. Carefully roll the zipper onto the opening. The rolling action will help to prevent air bubbles from being caught.
Roller excessively.
Rivets?
Some garments use rivets at one or both ends of the zip. I’ve not found these to be necessary but they are probably worth considering if the end of the zip is under a lot of stress.


Does it matter what material is used for the zip backing? Basically will it make any difference between cotton backed and nylon backed?
LikeLike
The zips I have generally used are YKK “Vislon” plastic chunky zips that have a nylon/polyester tape as well as moulded plastic teeth. I’ve also used Opti P60 & S40 zips. Both work very well.
With these zips, the material is woven and fibrous, a cut end will fray like a piece of cloth. This is (at least to my mental model) what is important. When we saturate this with Copydex and roller it, then we are thoroughly entangling the latex molecules in the Copydex with the minute strands of nylon. You can’t simply peel the copydex off, it is embedded.
I believe that cotton would work equally well, but might be more porous and take longer to dry when washing/drying the item. All the zips that i’ve used have been nylon/polyester.
LikeLike