Step 1. Print and cut pattern.
After configuring the pattern for your measurements, either through the website or the Seamly2D application you should be left with a pattern looking something like this.

Cut out the pieces and notch them in the locations marked on the pattern. In addition to the pattern’s notches I have added additional notches along the long seams, every 4-5 cm.

Step 2. Prepare sole pieces
As some of the curves are quite tight, and I have a hobby laser cutter, I have cut out the sole sections with a laser cutter, but you can do the same with a rotary cutter. I would though suggest a smaller (e.g. 28mm) rotary cutter .
I’ve chosen 0.4mm black latex for the sole.


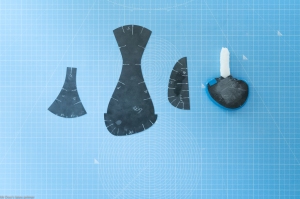
Once cut out you should have the following pieces for the two soles. Mark them up carefully to ensure the left and right don’t get confused, and transfer the alignment marks.

Step 3. Prepare leg pieces
Cut out the stocking tops. I’m using 0.4mm latex.

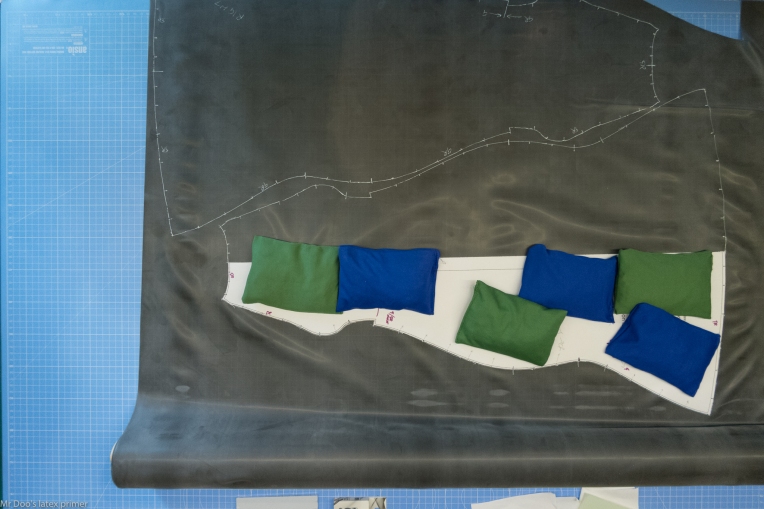
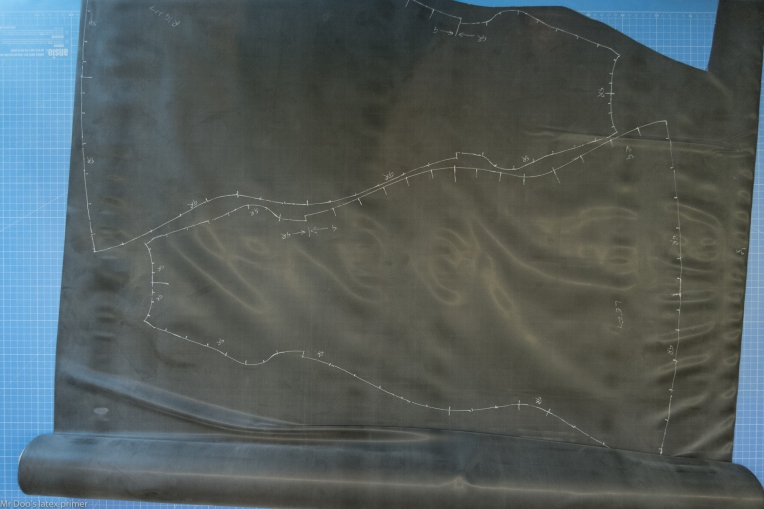
Cut out the leg pieces. I’m using 0.25mm translucent smoky black. I find it useful to use beanbags to hold the pattern piece in place.

Copy all notch information. Ensure you mark them left and right and then add the gluing information. I use the shorthand ‘G’ for glue-this-side (matt), and ‘GR’ for glue-reverse (shiny). On edges that are ‘G’ use longer marks for the alignment notches as otherwise they will be cleaned off when you clean the edge.

Step 4. Assemble the sole
The trickiest part of assembly is the toe section. This is because the curves are quite tight. It is hard to manipulate both pieces of latex accurately enough.
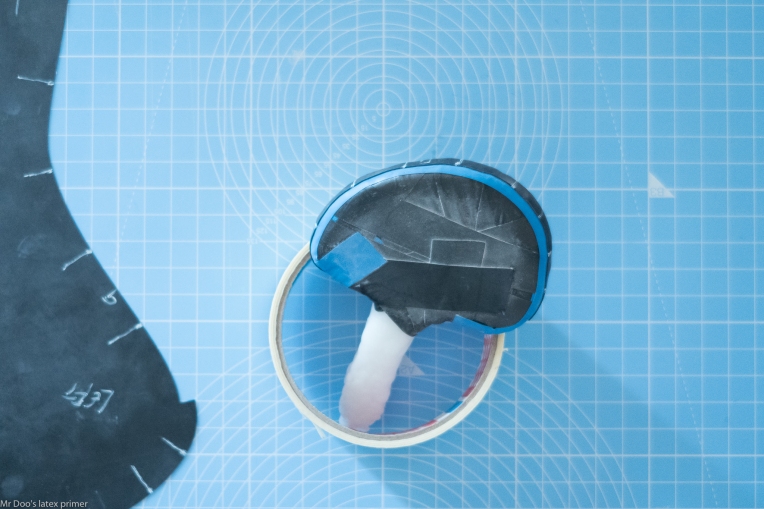
You can see in the picture below that I have created a tool to help me. This is a hand moulded piece of polymorph plastic (I use MultiMorph which you can buy from Amazon). I have covered the polymorph plastic in insulation tape with the sticky side outwards (once you have a turn or two of tape around the plastic this becomes easier). The net result is that you have a curved shape that is tacky.
My tool is similarly shaped to the toe section but is less wide. It is around 1cm wide with a flat section around the curve where we will form the seam.
Get a second colour of tape (mine is blue) and stick this (again tacky side outwards) along the curve of the tool.

Clean the shiny side of the toe piece and manipulate it so that the latex follows the curve of the tool neatly with as even a stretch as you can make.

The picture below shows the reverse side of the tool, once the toe section is stuck to the other side.

Clean and glue the edge of the toe piece. Ensure that you don’t completely lose any of the alignment marks.

Clean and glue the toe curve of the sole piece. I normally advocate cleaning and gluing an entire piece before assembly and the protection of glued surfaces with cling film tape. I’m not doing this here because we’re going to need to manipulate the sole piece quite a lot.

We will however use cling film tape to protect the glued edge on the sole section so that we can control when it is exposed.

Carefully aligning the sole piece to the toe piece, manipulate the latex so that the seam is created with a constant width and correct alignment. This is fiddly, but a lot less fiddly now that one of the pieces of latex is firmly under control. The image below shows the result of joining the sole piece to the toe piece. The are still currently attached to the plastic shape.

Carefully unstick the latex from the insulation tape.


If you are happy with the toe seam then proceed. If not, try again.
Join the heel piece to the sole.

The completed sole piece should now look like this.

Before proceeding with the leg glue the edges of the sole piece and protect with clingfilm tape.

Step 5. Assemble the leg
Clean and glue the stocking top and the top seam of the stocking leg.

Join the stocking top to the stocking leg.

Clean and glue the seams on on the leg piece.


Align the toe seam on the leg with the toe piece. Start joining these at the middle (protect the bits you don’t want to stick with clingfilm tape).


The resultant toe seam.

Flip the stocking over and join the seam up each side of the sole piece.

Work up to the heel on none side and then the other. You must start with the side where the leg piece is glued on the matt side.

Some bits need careful manipulation due to the fairly tight curves. It helps to stretch both pieces so that they are straighter, however ensure that they are stretched equally by observing the alignment marks.

The image below shows the first side sole seam completed to the heel.

We can then join the other side sole seam, when you get to the heel you will see why it is important to do the correct side first.
The image below shows the sole fully attached to the stocking leg.

Continue up from the heel toward the stocking top.

And firmly roller all seams. The seams around the heel are placed under a lot of stress when the stocking is being put on or removed and must be perfect.

Finished stocking:

I love that you took the time to upload this! You Rock! I ran into one issue where the heel was not part of the pattern download to Seam2D. I have everything else but no heel. Every seen that before?
LikeLike
Figured it out. Measurement from ankle to floor was wrong. Rookie Mistake.
LikeLike
Hello,
I am starting an apprenticeship of making clothes in latex and their tips and classes are really very good, I will follow step by step everything you teach to make a good garment. Thank you in advance, I will be attentive to any publication of you.
LikeLike
I have a few questions about the seamly2d website.
1. once you enter your measurements, are there any additional steps before the website configures them to the pattern?
2. the files that it gives me are in the .vit or .val format. what programs are you using to view them?
thanks
LikeLike
The .vit and .val files are intended for Seamly2D. However, if you just want to export the pattern as PDF, then you can do that directly from the website… (although there may be a bug at the moment that prevents this).
LikeLike
Hello.
I tried making the pattern with the Valentina app, and it is giving me the following error message.
“error calculating point ‘STD’. Curves ‘Arc_ARC_228’ & ‘splpath_L0C_GF_C’ have no intersection”
is this error going to effect the accuracy of the pattern and if so, how would i go about resolving it?
thank you.
LikeLike
Please re-check your measurements for leg_thigh_upper_circ and leg_thigh_mid_circ. I would expect the mid-thigh circ to be 10-15% smaller than upper thigh.
Regards
Mr Doo
LikeLike
Where was the pattern that could be downloaded?
LikeLike
I have fixed an issue with my-pattern.cloud that prevented the export of patterns. I have also updated the ‘Export shared pattern’ resource available from the my-pattern.cloud homepage. Please let me know if you still have any issues.
LikeLike
I tried this pattern out, but the stocking top is quite a bit shorter than the top part of the base stocking. Measurements are all correct. Any tips?
LikeLike
Are you happy to share the PDF with me? (mrdooslatexprimer@gmail.com)
LikeLike
I would like to try your pattern. I registered on https://my-pattern.cloud/ but I can’t find the pattern.
LikeLike
The next step is to join my group within my-patter.cloud. On the ‘Sharing’ tab on the main page click ‘+’ next to ‘My groups’, then use the code MDLP. See step 2 in https://mrdooslatexprimer.blog/joining-the-mrdoo-group/
Have fun
LikeLike
Hi
I have inserted measurements in the chart, but how do I get the template printed out? I don’t think Seamly2D can convert the dimensions :-(.
LikeLike
Hi!
It seems https://my-pattern.cloud/ is no longer available. Will you post your patterns on some other site?
LikeLike
Hi. There is currently an infrastructure issue and so the site is down. It should be up again in the next few days.
LikeLike
Hi, I tried to export your pattern from my-pattern.coud. I followed your instruction as on this blog https://mrdooslatexprimer.blog/customise-catsuit-pattern/
I am struggling with the export of the pattern. It looks like there is no pdf option available. Just “all pieces export” without the possibility of adding any page formats. I couldn’t open the “all pieces export” with Seamly2D. Do you have any idea how I can get the pdf export to print it on single A4 papers?
LikeLike
Sorry, the blog entry needs updating as the website has moved on since. The “all pieces export” button allows you to download the pattern as SVG. You can then open this in any vector graphics package (GIMP is good for this) and save it as PDF.
Alternatively, in Chrome browser, you can print the browser page (that is showing the ‘Download’ link). Destination: Save as PDF; Paper size: A0 (for example). This will then generate a PDF version directly from the browser.
Tiling a large (e.g. A0) PDF over multiple A4 sheets depends on what PDF software or OS you have.
LikeLike