The approach is similar to other builds, so if there are steps that I’ve not annotated then please see earlier walkthroughs.
I am lucky to have access to a desktop laser cutter (Emblaser) and this influenced some aspect of the design, such as the confidence in cutting the tight curves in the keyhole opening that need to survive stretch over the hips. I’ve suggested some alternatives at the appropriate points.
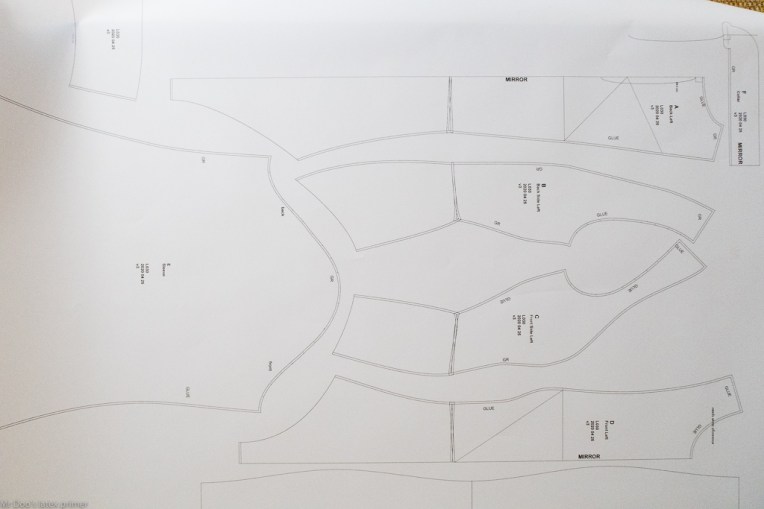
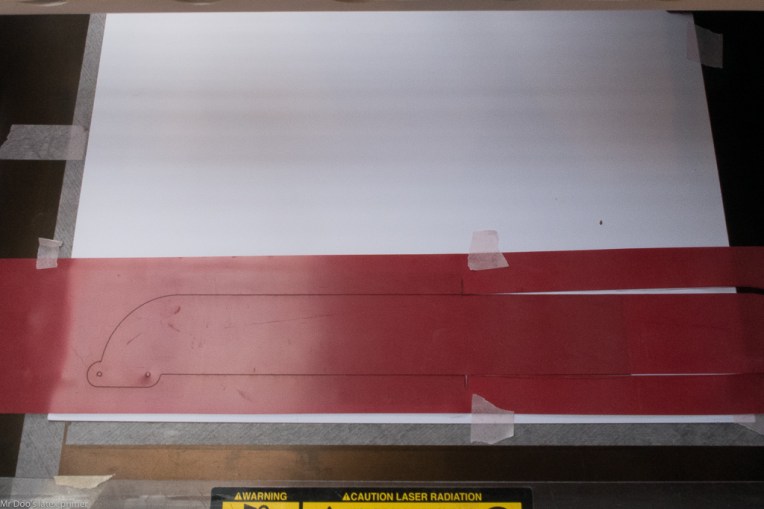
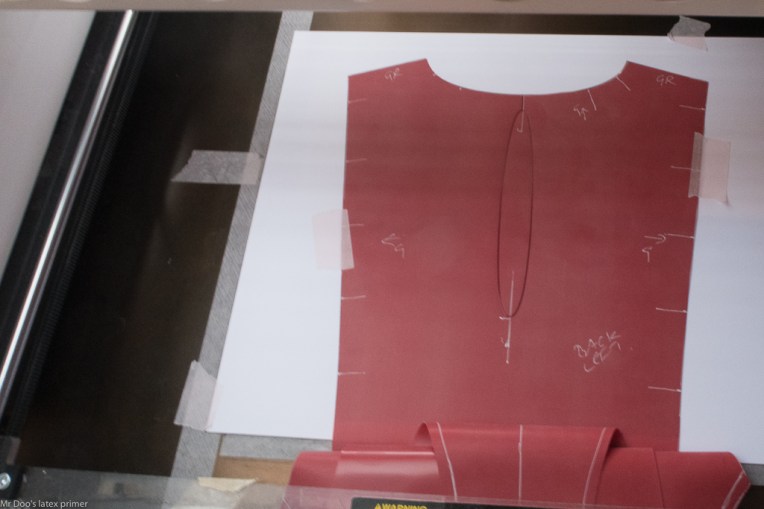
Pattern printed, in this case on 42″ roll paper.
Pieces cut out with rotary cutter. Photo taken before I used the notcher to mark the notches along the seams.

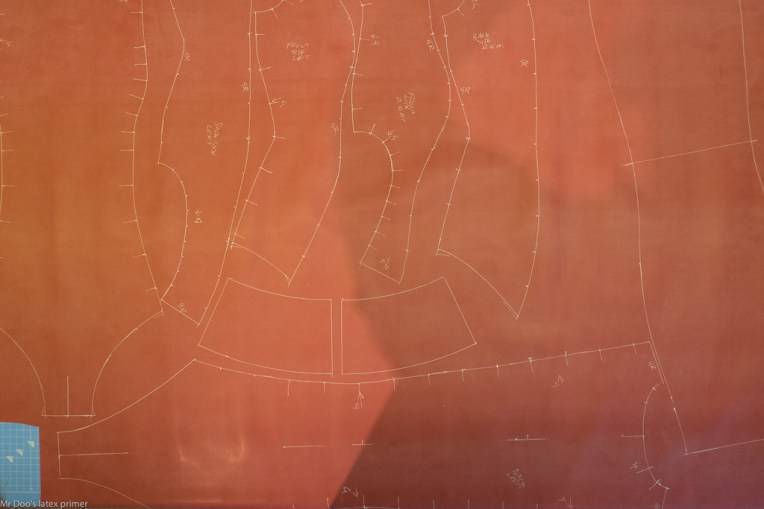
Traced onto latex (0.4mm Radical Rubber S30 Red). Ensure all marks and seam alignments are transferred and that pieces are marked accurately. Double check that you have a Left and Right for the relevant pieces (and that they are marked correctly) and that where pieces should have been mirrored (centre front, centre back) that this was done.
I use little weighted bean bags to hold the paper shapes flat on the latex. Also, it is vital to ensure that the latex sheet is not under any tension when you are marking it out.
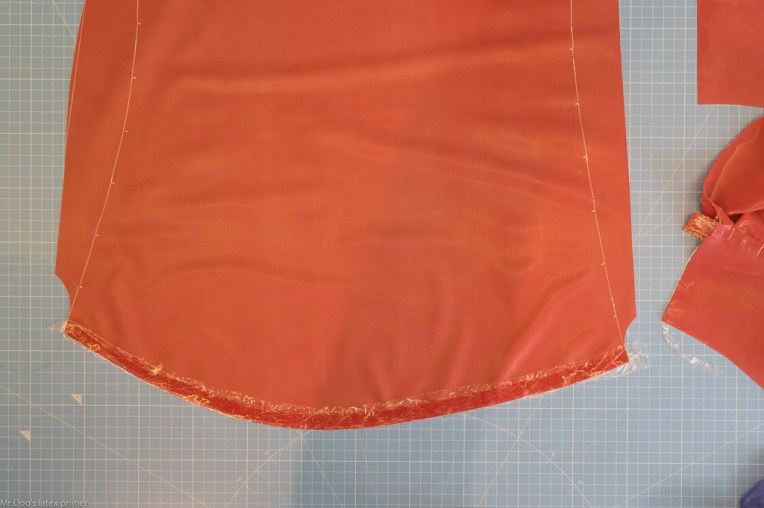
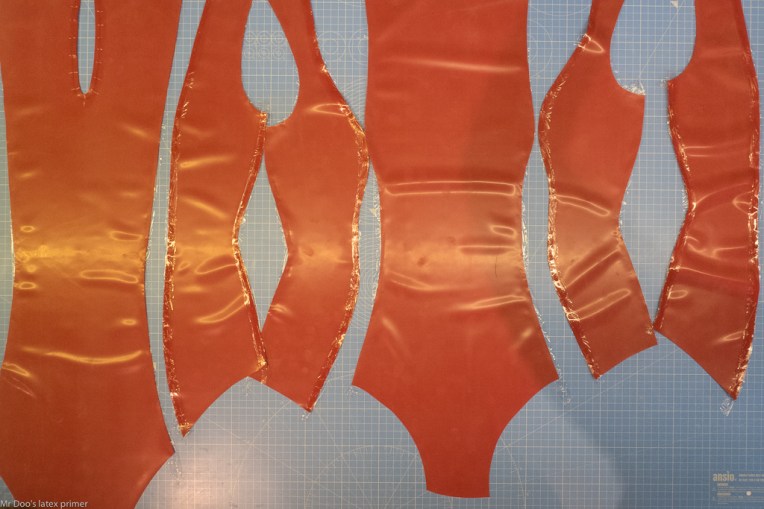
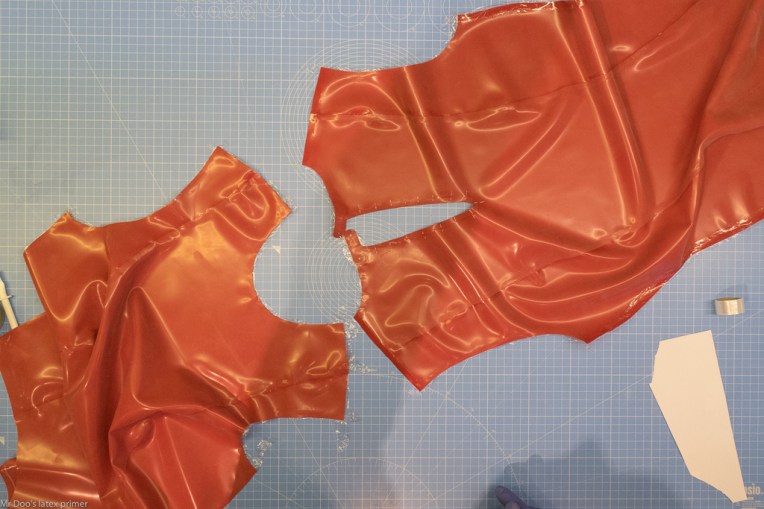
Cut out the pieces. Note that I’ve left the bottom cuts slightly long so that I can cut them to perfect alignment after joining the pieces. (Though I still aim to align the pieces as accurately as possible while joining them, it is easy to end up a mm or so out.)

Sleeves
My general approach is to complete the fiddlier parts of the build first. And to ensure that the hard bits are done before they are joined with other parts (minimising waste if you need to junk bits).
I’ve not done much box pleating and have hedged my bets by cutting the sleeve panel well outside of the final lines. If I mess up the pleating I’ll be able to cut off 15mm and move up the piece of latex.
Clean, glue and clingfilm BOTH sides.
We need to work out how to pleat this in order to match the cuff.
Decide how many pleats (I chose 6). Calculate the excess length (length of sleeve vs length of cuff) and divide this by the number of pleats.
For instance, if the sleeve is 56cm and the cuff is 20cm then you need to lose 36cm in the pleats. If you have 6 pleats, then each pleat needs to consume 6cm.
Divide the cuff by the number of pleats, but offset this by 1/2.
For instance, if the cuff is 20cm and you’re using 6 pleats then the spacing would be 1.7cm 3.3cm 3.3cm 3.3cm 3.3cm 3.3 1.7cm. Mark these on the sleeve, interspersed with the pleats.
Following the above example the marks would be separated by 1.7cm 6cm 3.3cm 6cm 3.3cm 6cm 3.3cm 6cm 3.3cm 6cm 3.3cm 6cm 1.7cm.
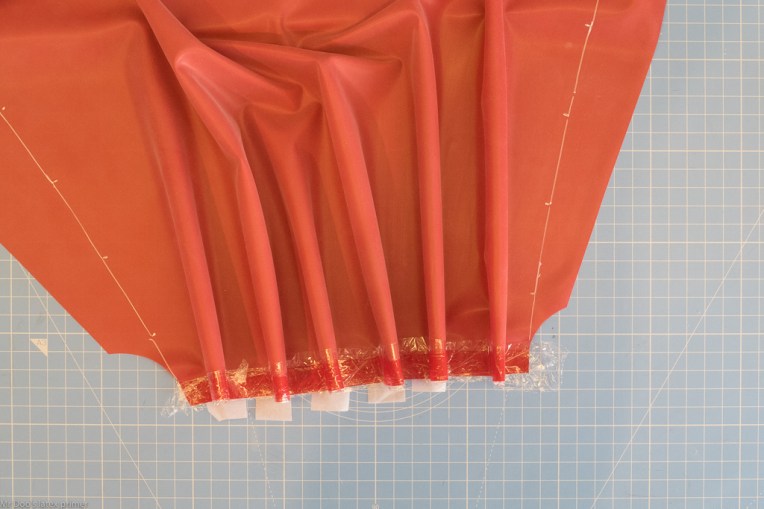
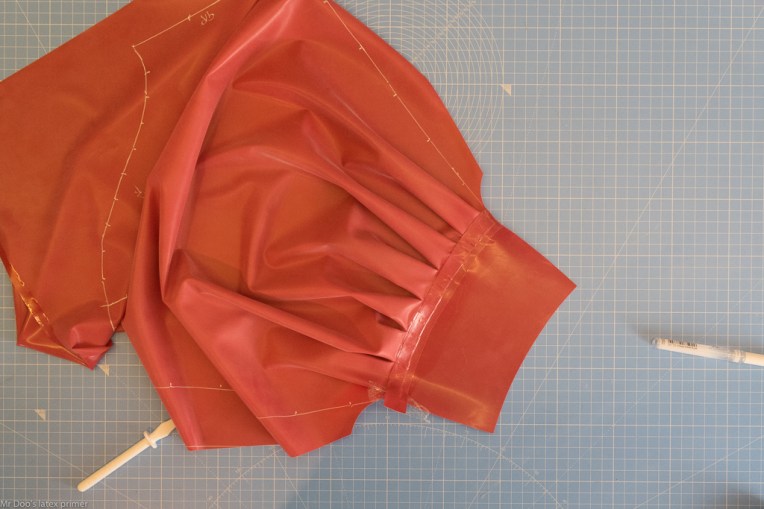
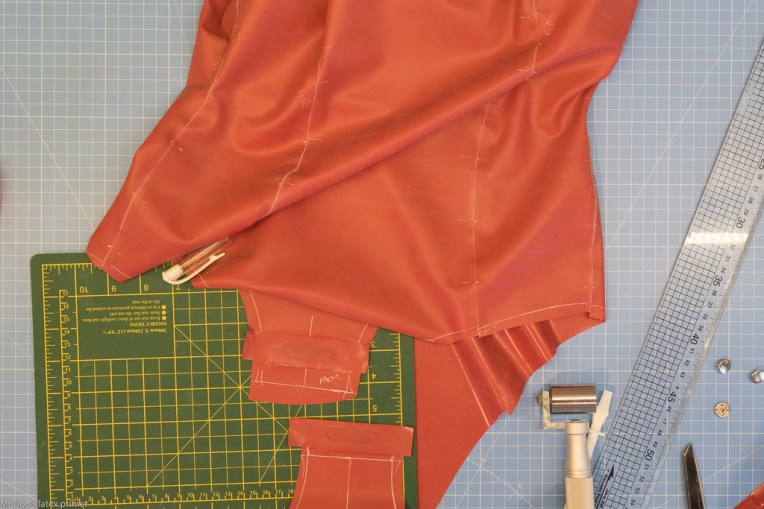
This picture shows both the preparation for laminating the cuffs, and the markings for pleating the sleeve.

Pull up the bits to be pleated and hold these in place on the underside (shiny) with low tack masking tape. Check the result against the cuff.

Working on the matt side, squash each pleat one by one, removing the clingfilm for that pleat. Ensure that the edge alignment is maintained as you do.

Turn over, remove the masking tape. Then one pleat at a time, remove the clingfilm and let the pleats stick. Ensure that the edge alignment is maintained as you do.
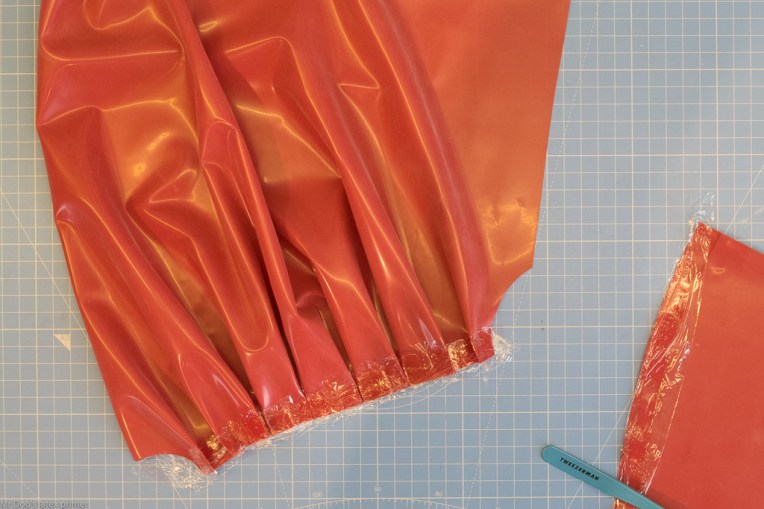
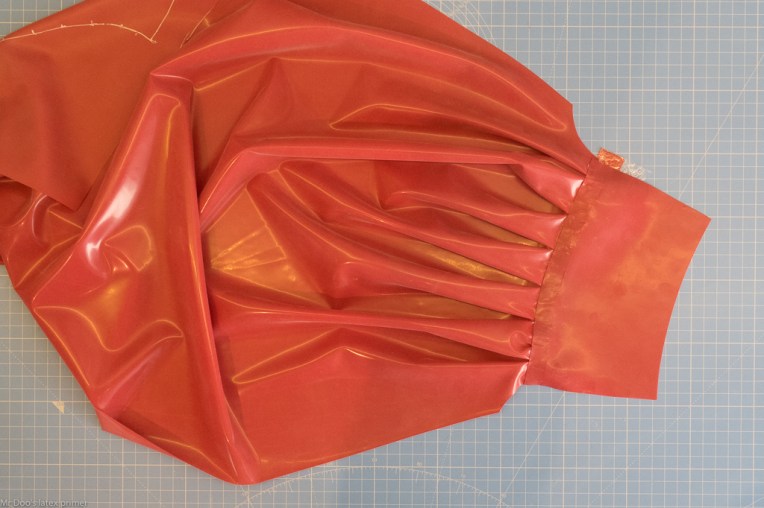
The pleating is now completed and ready for the cuff to be attached.

When laminating the cuffs I cleaned both (matt) sides, and spread glue on one side (using a wide spreader cut from a credit card). Laminate using a foam roller (very gently) to ensure you don’t get bubbles. Note that I’m not laminating the first 15mm of the cuff that will mate with the pleats on the sleeve.

The piece I was laminating with was larger than the cuff I needed and can now be trimmed.
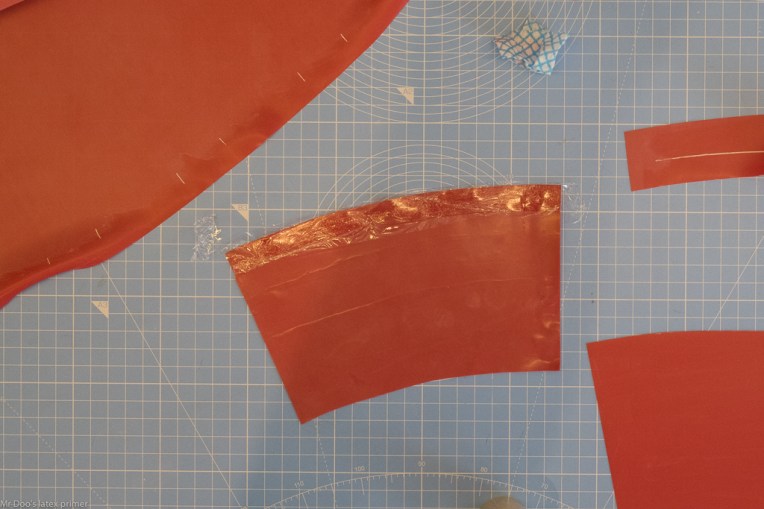
Align the cuff and sleeve and mark the cuff where it should align with the pleats.
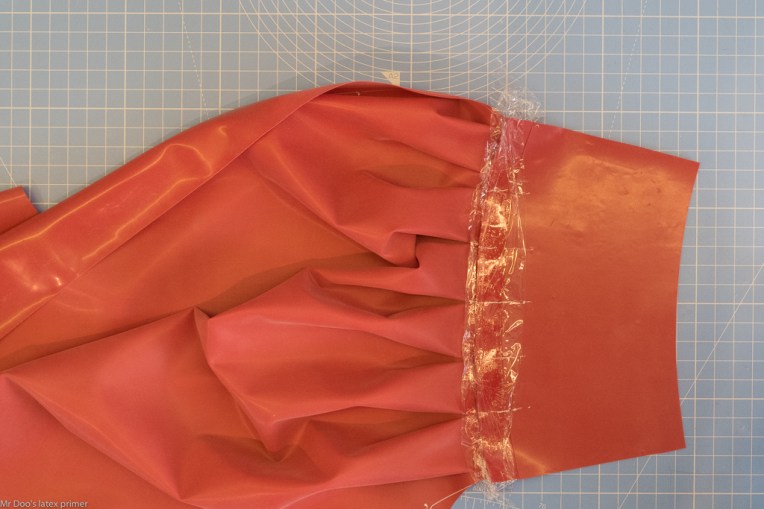
Attach the cuff to the sleeve.

Prepare a 20mm strip to cover the inside of the pleats.

And attach and trim.
This is the shiny side.
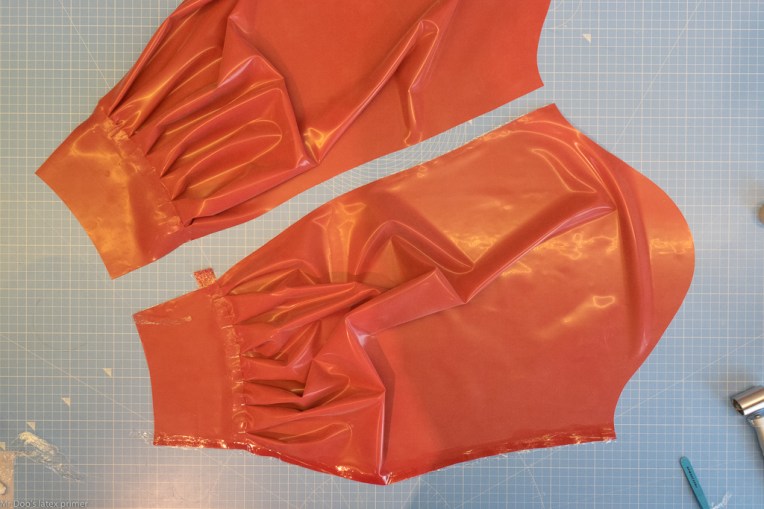
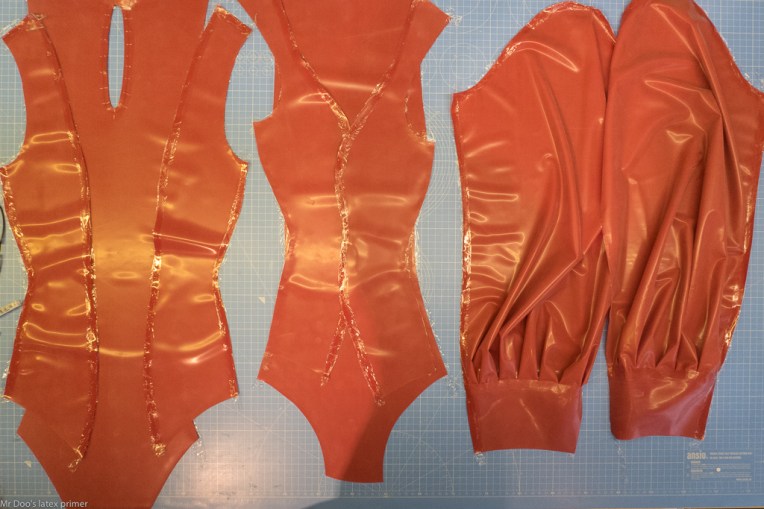
Both sleeves prepared.
Collar
The collar is slightly too wide to cut on the A3 laser cutter, so cut in two passes. To ensure alignment I first cut a shape in the card (just visible through the latex).

So that I can flip the latex over and align the cuts…

And complete the cuts.
Keyhole
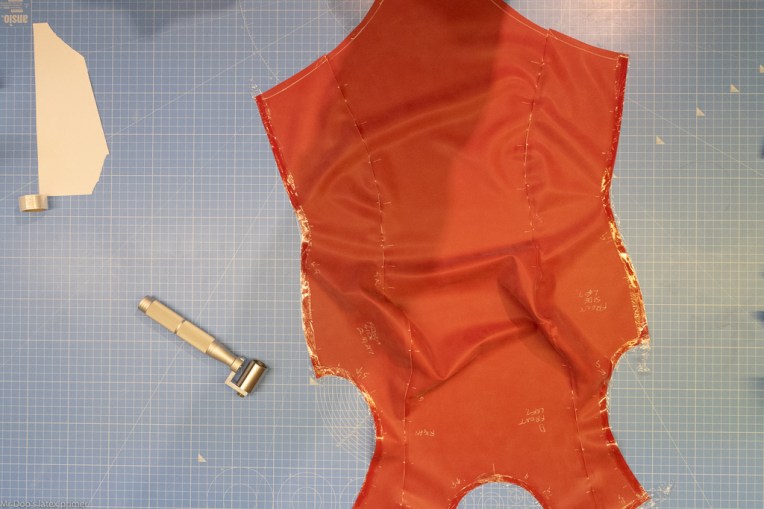
Similarly, white card cut to the outline of the back panel…

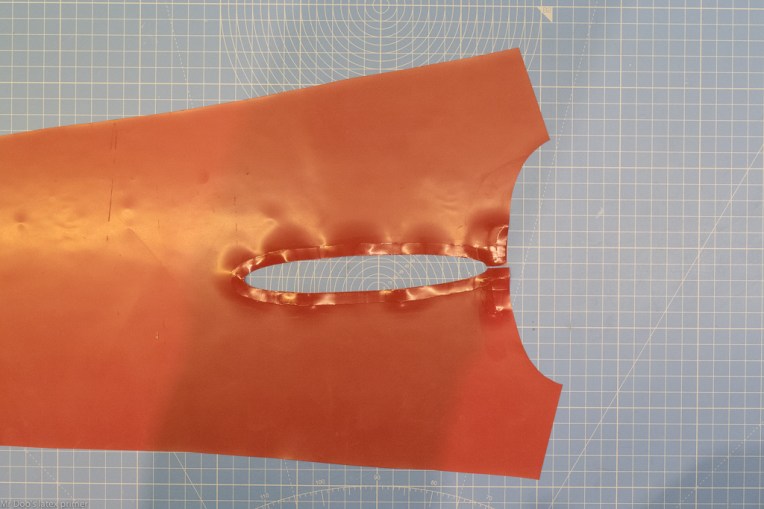
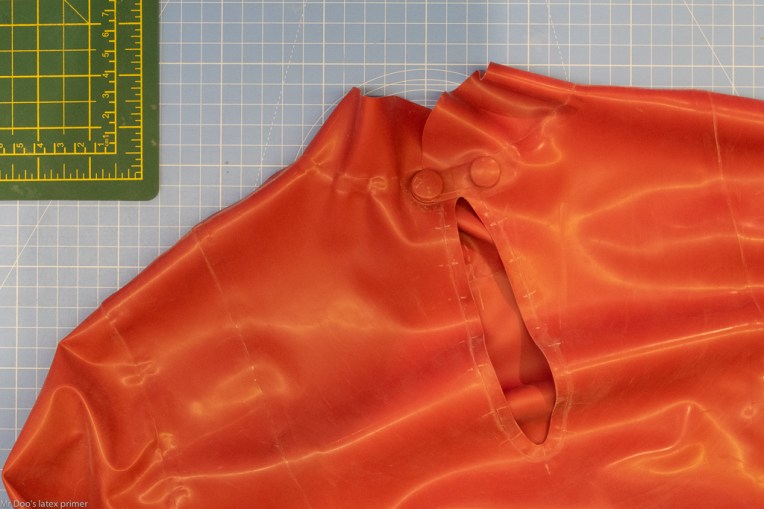
…so that I can place the latex in exactly the correct place to then cut the keyhole in the back. Using the laser cutter you get very smooth curves that would be impossible, at this radius, with a rotary cutter. A smooth curve gives protection from ripping.
If you don’t have access to a laser cutter you could: i) use a zip instead down to the mid-back or waist; ii) use a hole punch to create a smooth tight curve; iii) use a more key-hole shaped opening with a wide curve so that the tension (of pulling the neck over the hips) isn’t concentrated on such small place..
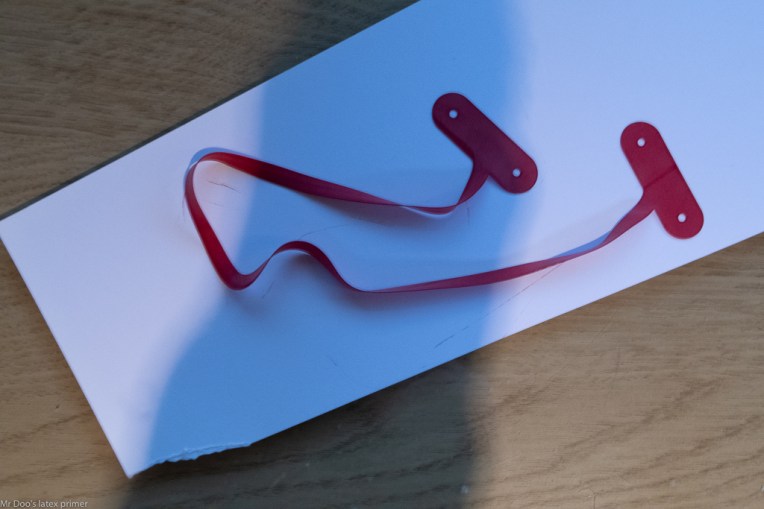
I also laser cut a reinforcement trim to go around the opening.
Clean and glue the opening (shiny side).
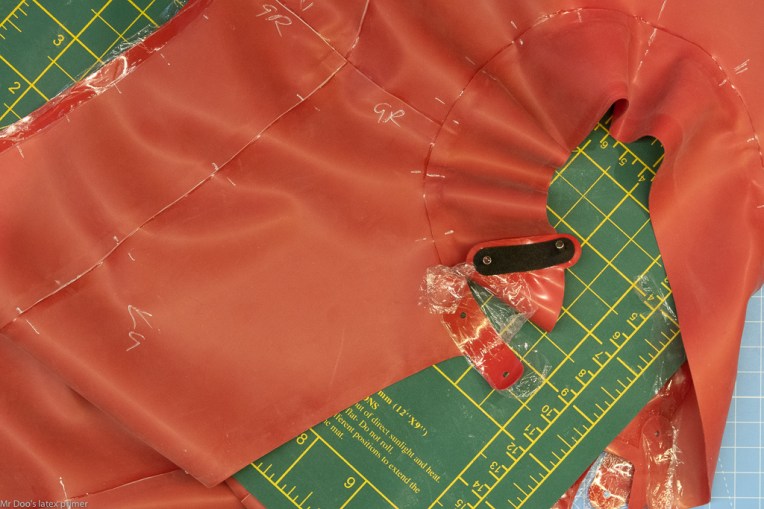
With clingfilm protecting the glue, align the trim and mark the alignment.

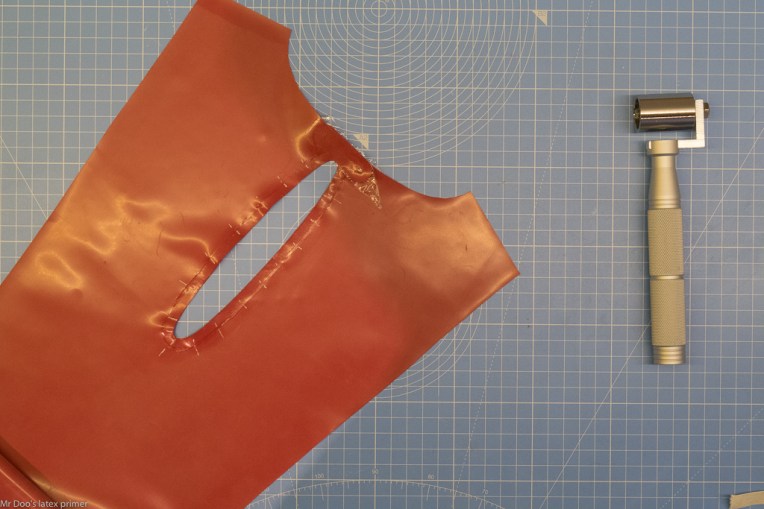
Then, working from midway to each end attach the trim.
Body
Clean and glue all body pieces and use clingfilm tape to protect the glued edges. Do a final check that the seams form pairs (i.e. glue on shiny mates with glue on matt).
All parts including the sleeves which already have their cuffs.
Starting the main construction with the back sides onto the back.
Like so…

And the other side…

The back is now complete, at least until we have the collar.

Similarly join the front pieces…
Roll each seam as you join it so that you don’t lose track of what has been rollered. 
The completed front…
Next, join the back and front at the shoulder seams.

Markup the inside of the collar with spacing to match markings on the collar itself. After taking this photo I added additional marks midway between the 5cm spaced marks.

Starting from centre front, join the collar to the body, leaving the popper parts until later.

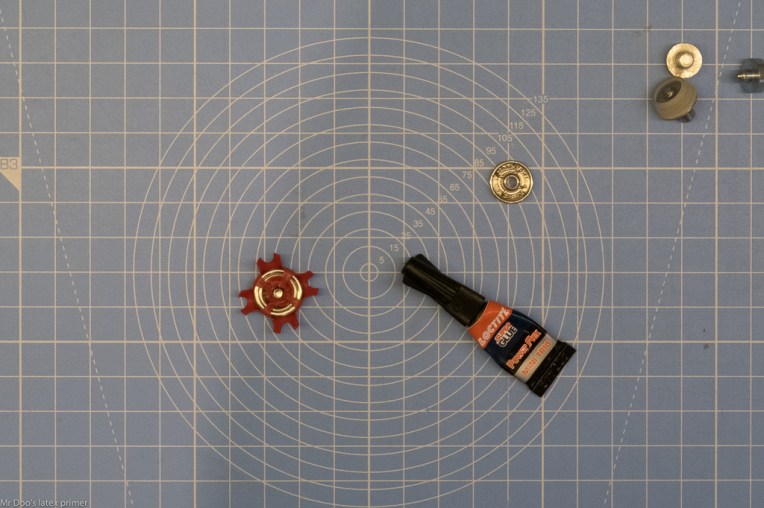
In advance I have created some popper reinforcements from cotton tape treated with Copydex. (These also cut on the laser cutter, for neat curves, but could also be cut squarer by hand.)
Using the popper stems for alignment, complete the attachment of the collar. The ends where the poppers go are now a of latex-cotton-latex sandwich.

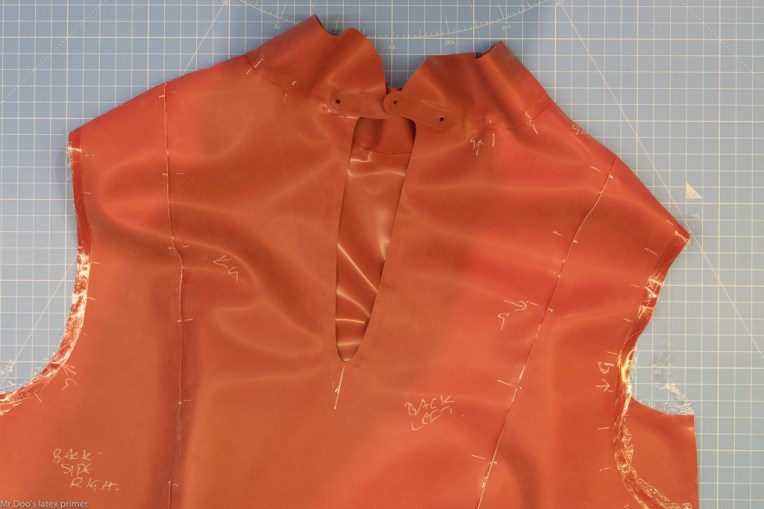
The collar fully attached.
Lay the body so that the armscye is opened out. Ensuring you have the correct sleeve (in this case Right) match up the seam alignments to ensure starting at the correct alignment marks.
In this case, as the sleeve is so loose, I’m attaching the apex of the seam to align with the should seam directly. (On tighter fitting sleeves this can be offset.)

Having joined from shoulder to back, finish the seam from shoulder to front.

The seam is now attached and rollered.

Do the same with the other sleeve…

Both sleeves now attached, ready for closing the final seams.

Starting at the cuff, join the seam up the sleeve and then down the body.
I’m using a ruler as a flat surface to join against.

Through the armhole and down the side seam.

One sleeve done.

Do the other sleeve in exactly the same way.

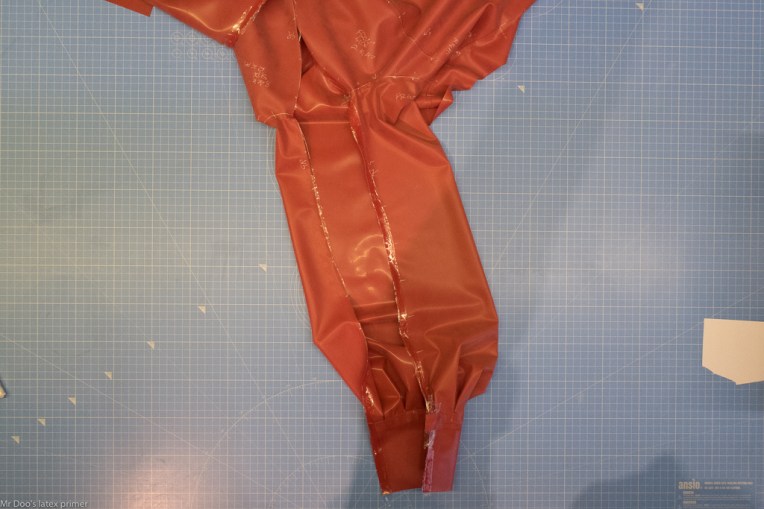
All the seams finished except the crotch.

Diverging from the plan at the last minute, I’m pulling the crotch opening forward by about 25mm. I’d allowed excess on the back piece when cutting out to provide this flexibility.
Add Copydex treated cotton strip to reinforce poppers. I cut these for three poppers, but ended up just using the outer two.

Reinforced popper strips sandwiched.
Each panel was initially cut allowing an excess in the leg opening for ease of alignment. The seams have been glued aligned to within 1-2mm, but can now be cut in one pass giving a clean edge. Before cutting…
…after cutting…
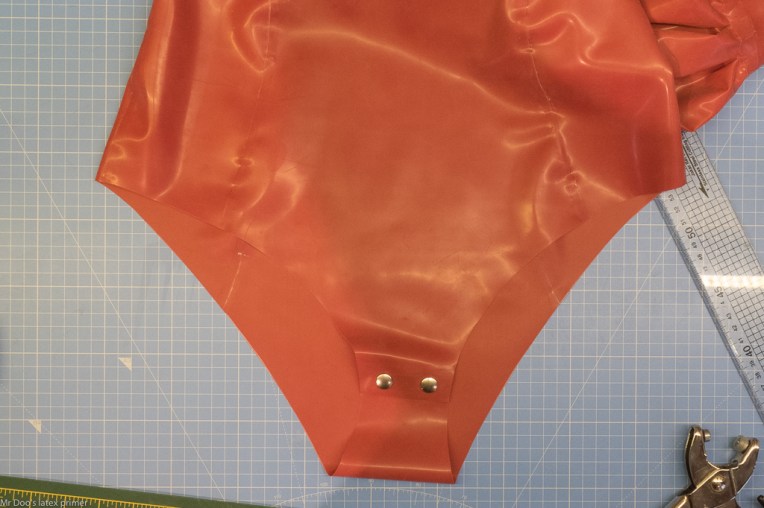
Poppers in place, and leg openings trimmed.
Covered poppers
I’m covering the back poppers so that they are more discreet.
Cut out the covers and a small circle that acts as an anchor. Clean and glue the matt side of the anchor and the arms of the cover.

Superglue the anchor in place

Pull the arms into place with tweezers and stick each to the anchor.
Use more latex adhesive as required as you pull each arm into place.

Finished popper.
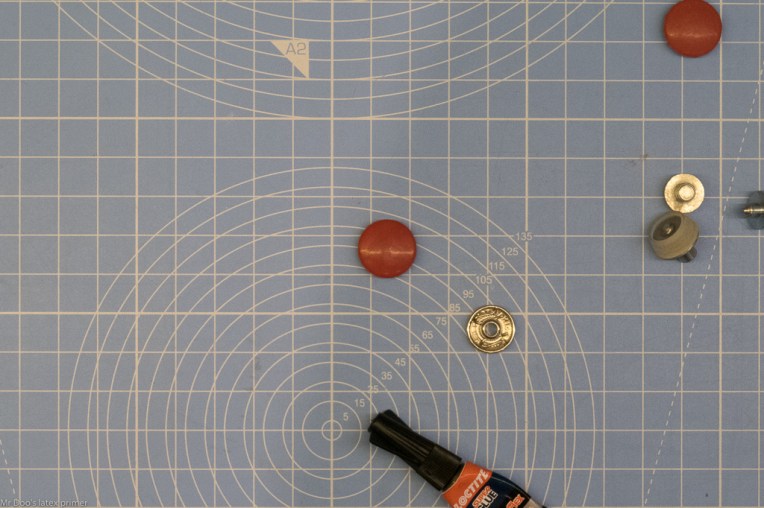
Colour matched poppers in place.
I’ve attached one side of a popper 1/2 way between centre and shoulder, at the bottom of the collar. This is to hold the bow. This again uses a small circle of Copydex treated cotton and a circle of latex over the inside of the popper.

Bow
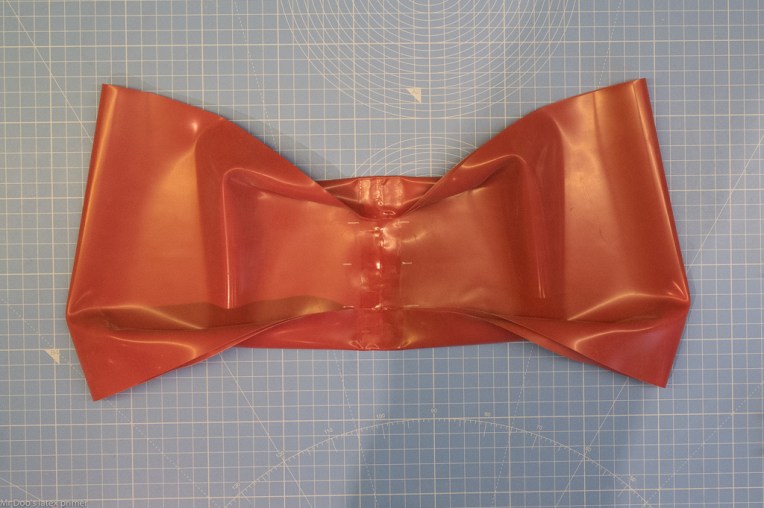
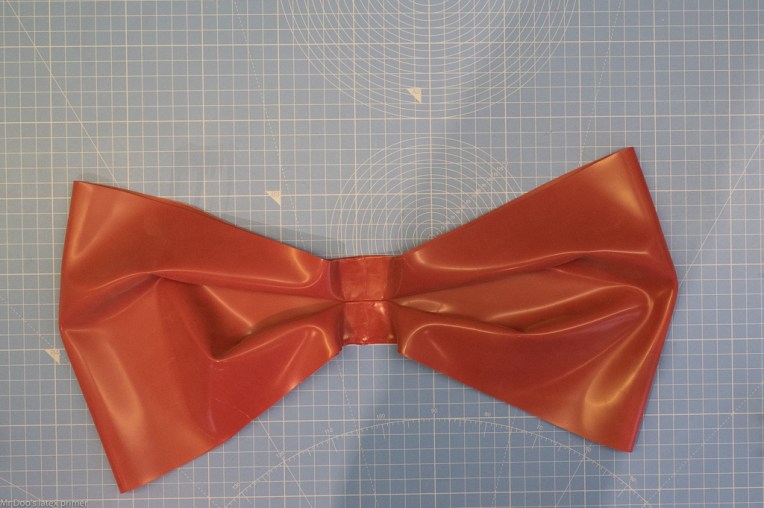
Fold each side into the centre.

Clean and glue a strip down the centre on both sides. I’ve marked it out into 6 divisions.

Concertina the bow from each side.
Working towards the middle.
Re-open the first fold to embed a piece of Copydex treated cotton.

And fit a popper. Glue the fold back down to hide the head of the popper.

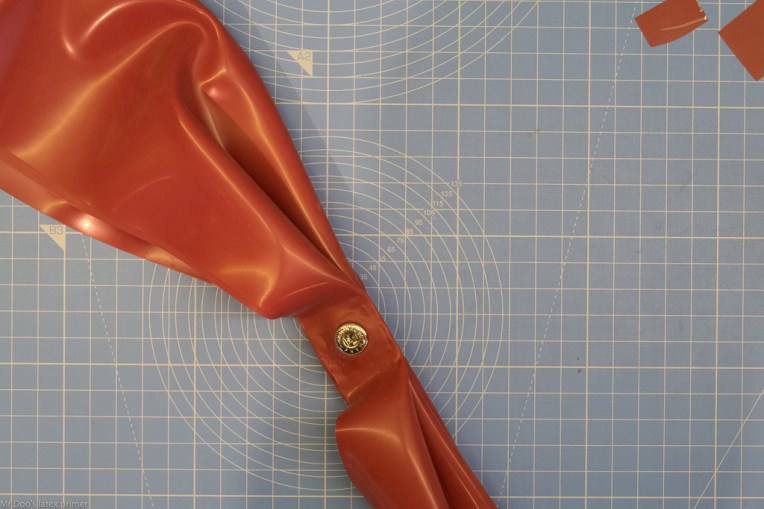
Completed bow.

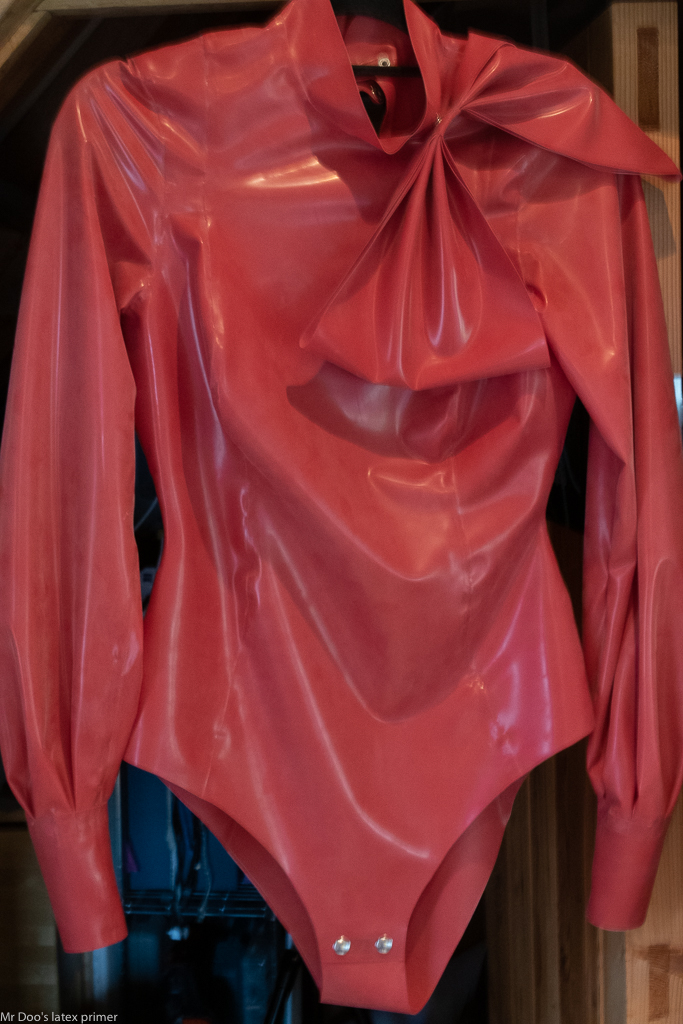
Finished item